From Mood Board to Final Design (one)
Sometimes when you are looking for an idea to upgrade a space, it is easy to feel totally overwhelmed by the different images you get when browsing Interior Design websites, blogs, social media, or even looking through home magazines and newspapers.
And that doesn’t even include visiting furniture or homeware shops where there is just too much choice.
I know the feeling.
To help you on your make-over-journey, here are a few pointers. At the end I will also add my own mood (also called inspiration) boards to show you how I have given my living room a make-over:
But before I start……
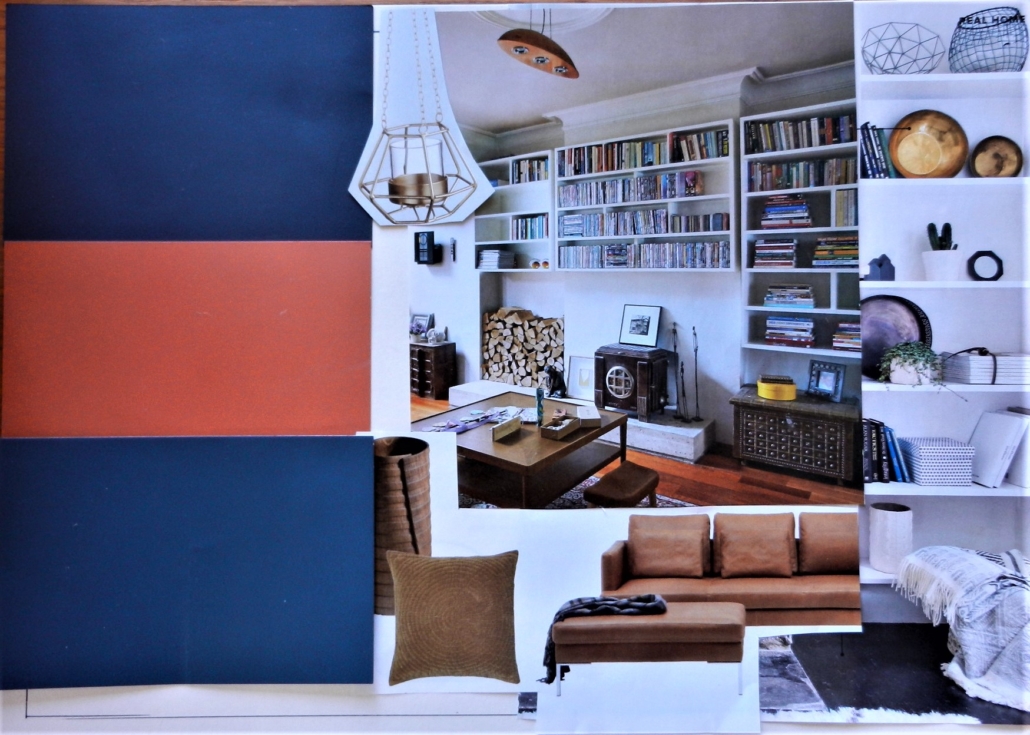
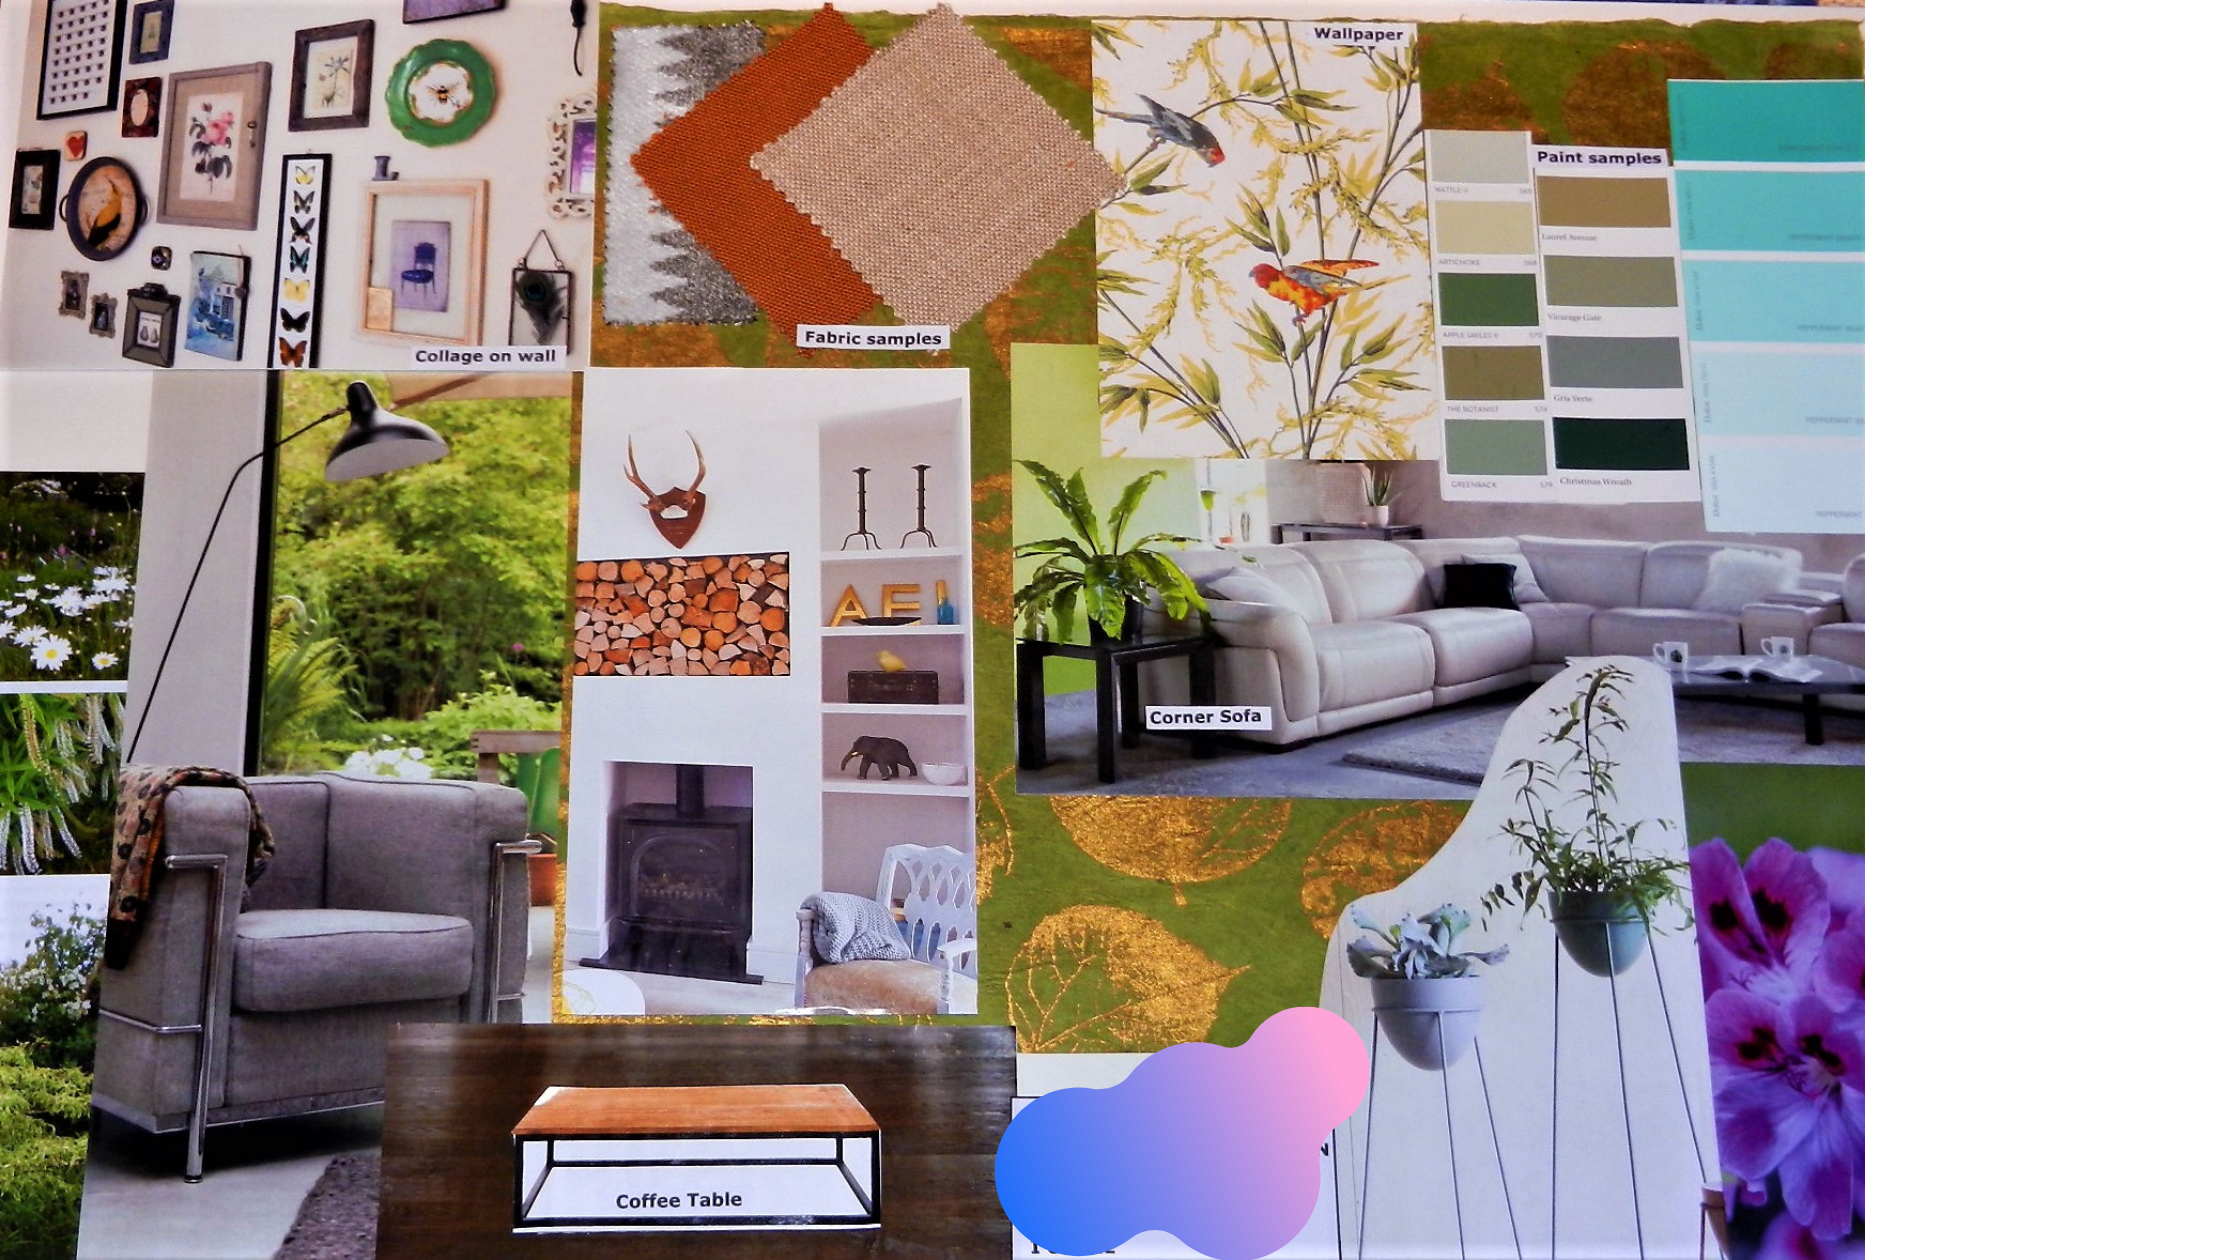
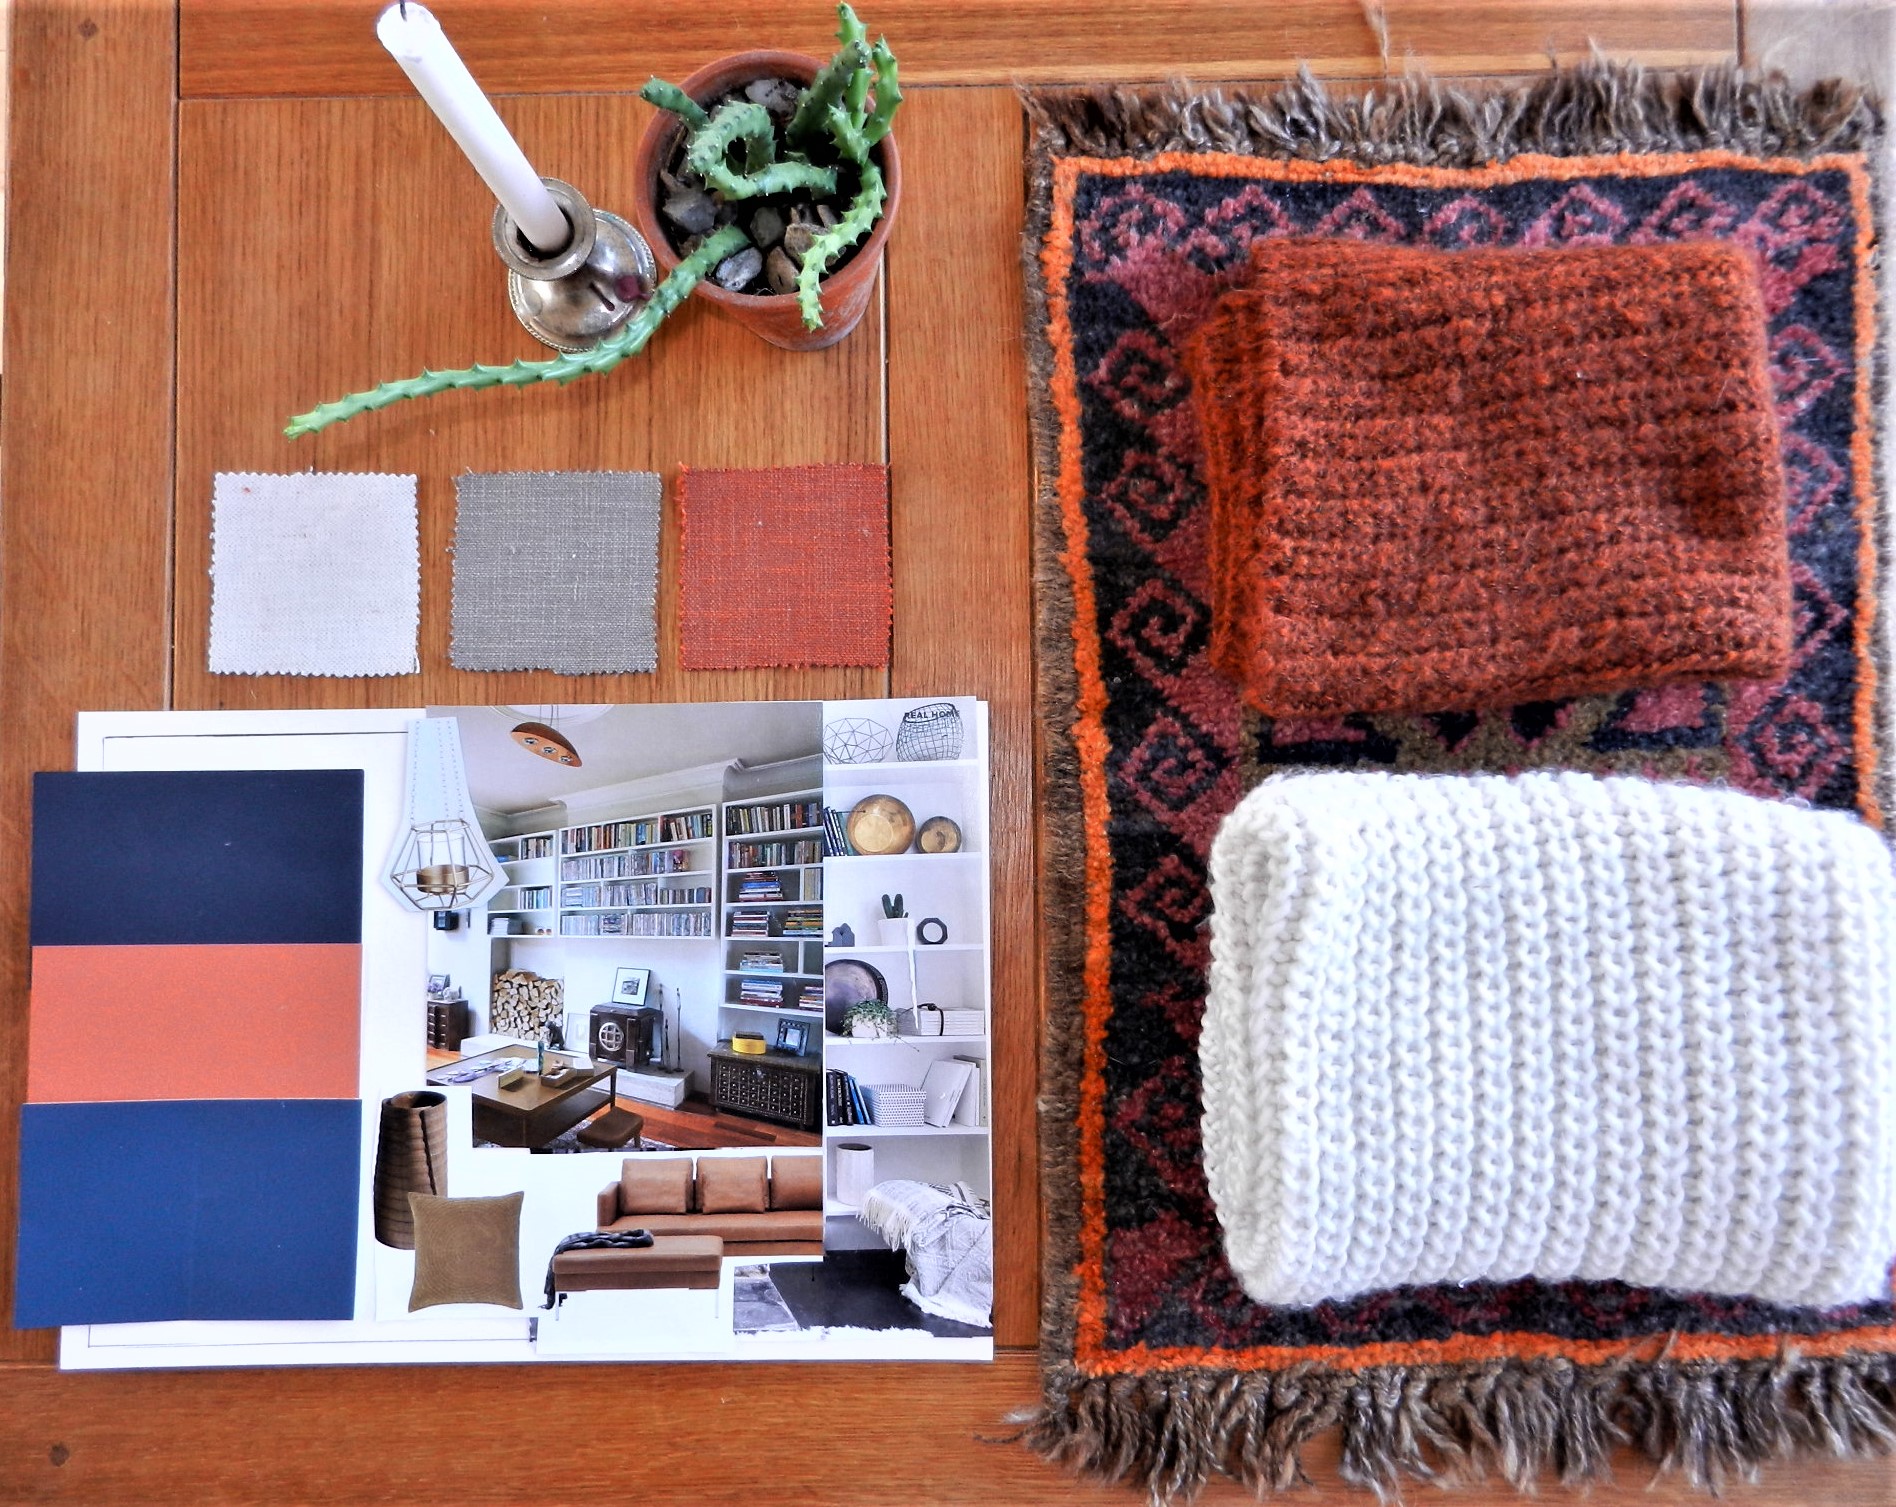
A mood or inspiration board is used to help inspire you while you are busy with designing. We use it as a tool to visualise your ideas for the space. You can use it for images you think might work in the space and eventually narrow it down to your final design. It can also express the feel of your design. It can include anything which you would like to see in the space. Colours are important as well as shapes, textures and ideas for furniture, lights, soft furnishings et cetera.
After you’ve decided what you want to do with your space, maybe sketching your ideas and have a basic lay-out of your furniture, then you can start putting together a mood board.
My seven pointers to help you on your make-over journey:
- Make a list of all the things you want to change in the space. Write and sketch. (The sketches are for yourself, so don’t be shy!)
- If you need some inspiration visit home décor shops and take pictures of the things you love. Pull all those magazines and pictures on Instagram and/or Pinterest closer and put them together.
- These will include the colours, certain styles you really like, furniture pieces, lamp shades and fittings, soft furnishings, everything that you really like to look at and would enjoy in the space.
- After a while you will see some kind of thread that binds these things together – maybe a colour, maybe a type of style or kind of furniture or soft furnishing, or a mood. They characterise what you want in this space.
- Narrow your ideas down. The different pieces of furniture, the different colours or shapes or textures. Stick them on a piece of cardboard, preferably a mounting board because that kind of board is nice and thick and can stand against a wall. You want to have a look at the ideas from a distance to see if it works together and if you like it!
- This will make it clear in your mind which items and pieces and colours you really enjoy. They will be the basics for your design.
- Keep the mood board close by when you start your design and go back to it if you suddenly feel unsure about your design.
I recently made some changes to my living room. The room felt a bit dated, also too cluttered and in places too dark, so I had to focus on that. Keeping my budget in mind, I kept all my big furniture and most of the soft furnishings, although I did bring many books to the charity shop.
So, it was mainly the colours of the walls, including the built-in bookshelves, and ceilings that I changed as well as the light fittings, some soft furnishings and the pictures on the walls.
In Part Two you can read further about my living room make-over journey…..
Enjoy your own make-over journey and feel free to message any questions.


Trackbacks & Pingbacks
[…] Here are a few mood boards I made for clients. This really helped them to see the space visually. I also talk about the use of mood boards in a previous blog. […]
Leave a Reply
Want to join the discussion?Feel free to contribute!